Rubber flooring tiles are a popular choice for various spaces due to their durability, versatility, and ease of installation. Whether you’re looking to upgrade your home gym, office, or play area, installing rubber flooring tiles can be a rewarding and cost-effective DIY project. Here’s a comprehensive guide on how to install rubber flooring tiles with ease:
Step 1: Gather the Necessary Tools and Materials
Before beginning the installation process, ensure that you have the following tools and materials on hand:
- Rubber flooring tiles
- Tape measure
- Utility knife
- Straight edge
- Chalk line
- Double-sided carpet tape (if necessary)
- Rubber flooring adhesive (if necessary)
- Rubber mallet
- Broom or vacuum
- Damp cloth
Step 2: Prepare the Subfloor
Start by preparing the subfloor where the rubber flooring tiles will be installed. Ensure that the subfloor is clean, dry, and free of any debris or imperfections. If necessary, repair any cracks or uneven areas to create a smooth and level surface for the tiles.
Step 3: Measure and Plan the Layout
Measure the dimensions of the space to determine the layout of the rubber flooring tiles. Use a tape measure and chalk line to mark straight guidelines on the subfloor, outlining the placement of the tiles. This step is crucial for achieving a symmetrical and balanced installation.
Step 4: Cut the Tiles to Fit
If necessary, use a utility knife and straight edge to cut the rubber flooring tiles to fit the designated area. Take precise measurements and cut the tiles with care to ensure a seamless and professional-looking installation. Avoid rushing this step to achieve accurate and clean cuts.
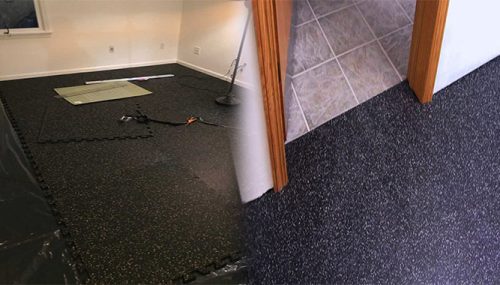
Step 5: Install the Tiles
Begin installing the rubber flooring tiles, starting from one corner of the room and working your way across the space. If the tiles have interlocking edges, simply fit them together like a puzzle, ensuring a snug and secure connection. If using adhesive, apply a thin, even layer to the subfloor and carefully press each tile into place.
Step 6: Secure the Tiles (If Needed)
If the rubber flooring tiles do not have interlocking edges and require additional security, use double-sided carpet tape to anchor the tiles to the subfloor. Ensure that the tape is placed along the edges and corners of each tile to prevent movement or shifting.
Step 7: Make Final Adjustments
Once all the rubber flooring tiles are installed, use a rubber mallet to gently tap the tiles into place, ensuring that they are level and uniform. Wipe the surface of the tiles with a damp cloth to remove any residual adhesive or markings, leaving the floor clean and polished.
Step 8: Allow for Proper Setting and Cure Time
If adhesive was used during installation, allow the rubber flooring tiles to set and cure according to the manufacturer’s guidelines. This will ensure that the tiles bond securely to the subfloor and remain in place for the long term.
Step 9: Enjoy Your Newly Installed Rubber Flooring
Once the installation process is complete and the tiles have set accordingly, you can enjoy the benefits of your newly installed rubber flooring. Whether it’s a resilient home gym floor, a comfortable play area, or a versatile office space, your DIY installation will provide a durable and stylish flooring solution.
Installing rubber flooring tiles can be a straightforward and gratifying DIY project, offering a practical and long-lasting solution for a wide range of spaces. By following these steps and exercising patience and precision, you can achieve a professional-looking installation that enhances the functionality and aesthetics of your chosen area.